
How to Use Drop Shadows in Canva

Canva is a great tool for creating marketing materials and social media graphics for your business. Did you know you can also use it to add dimension to your designs and easily create mockups? Today I’m going to walk through how to use shadows in Canva and my take might surprise you!
First, let’s discuss the basic design principles of how to approach using shadow. Google Material Design’s definition of shadow says, “Shadows provide cues about depth, the direction of movement, and surface edges. A surface's shadow is determined by its elevation and relationship to other surfaces.”
This is sort of a fancy description for what we’re talking about today but I mostly wanted to highlight that a shadow is supposed to be realistic so it’s important to use a light hand and make sure it reflects what the object would be like if it existed in real life.
How to create a drop shadow in Canva
Select a Size
The first step is to choose what type of graphic you want to make and clicking “Create Design” on the top right of the Canva homepage. One of the great things about Canva is that they have a ton of preloaded sizes that you can search. This is super handy for creating things like Instagram stories, Pinterest pins, and marketing materials because you don’t have to go searching for the correct dimensions.

Import Image
In this example, I’m creating a listing image for my Etsy shop. Since it’s a digital product, I want to use the shadow to help make the item appear more “real” to the buyer.
Adding images to Canva is super easy. Simply drag and drop a JPG or PNG image into the Canva window and it will automatically upload and show up on the “Uploads” tab. Alternatively, you can also click the “Upload Media” button in the “Uploads” tab to search your files and upload an image manually.
Drag the image into your design and size it however you’d like.

Add a Drop Shadow
To add a drop shadow to the image you imported, click the image and you’ll see an “Edit Image” option show up on the top white bar of the Canva workspace.
After clicking, a panel will pop open on the left and you can scroll down to find the “Drop Shadows” menu.
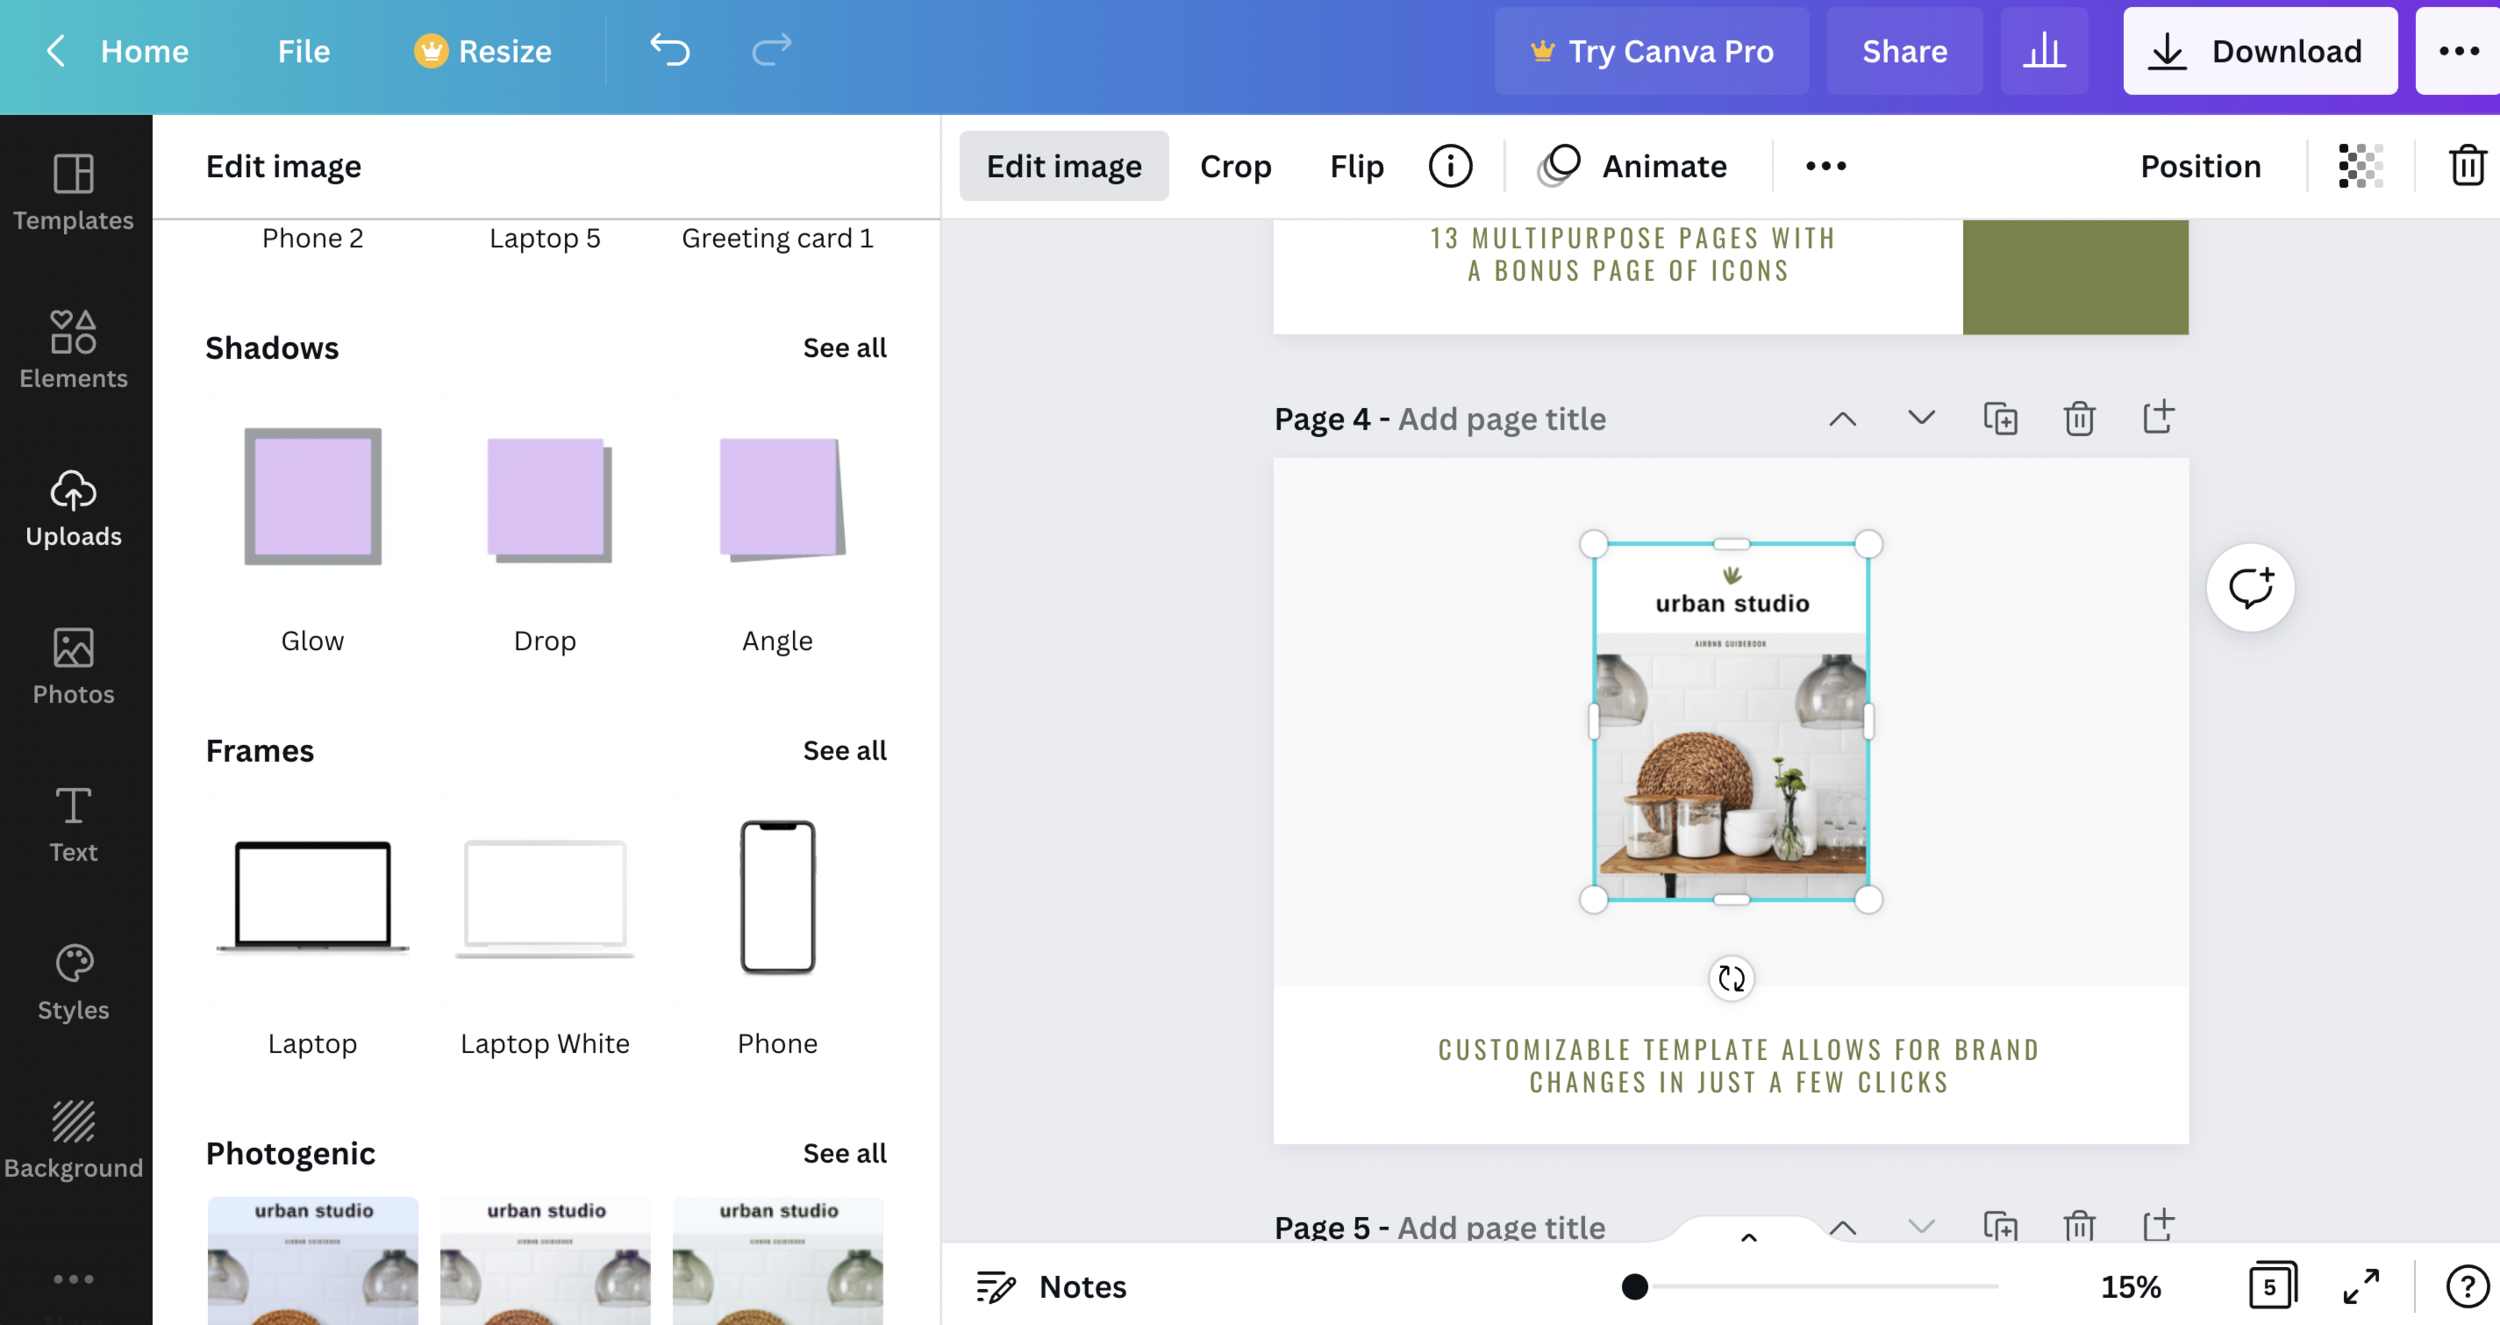
Choose a Shadow Style
You can click “see all” to view all the shadow styles, but it’s likely that you’ll be using one of the first two options: glow or drop. The drop shadow style is a good classic option but lately I’ve been a fan of the more subtle “glow” style. Rather than only having a shadow on the bottom right on the image, there’s definition around the whole image. This is a good option to use if you’re placing an image on a light background color and want it to stand out.
To apply a shadow, simply click the one you’d like and it will appear on the image you added. You can still resize the images as needed without impacting the drop shadow you applied. You might notice that the shadow is a bit harsh when you first apply it, but that’s okay!
To soften the drop shadow, click the “edit” icon that appears over the drop shadow style before clicking the “Apply” button.

You can then tweak the size, transparency, and blur of the drop shadow you applied. I’ve tried to streamline this process by making these simple adjustments when using the glow style:
Size: keep at default of 4
Transparency: keep at default of 50
Blur: increase to 10
Color: I almost always use the 3rd default gray in the color palette panel, but you can also try the second darkest. I find the black is just a bit too harsh in general.

Apply Your Shadow
The last step is to simply click the purple “Apply” button. Ta-da! You now have a nice and subtle drop shadow for your image. This method works great for mocking up digital products like e-books, opt-ins, and more.
I highly encourage you to scroll through the other image effects in the “Edit Image” menu to familiarize yourself with all the options Canva has to offer. There are some great mockups that can be applied in just one click: phone frames, laptop screens, and even realistic mockups for scenes, paper products, and apparel.

If you enjoyed this tutorial, pin and save for later!
I hope this post answered all the questions you have about adding shadow in Canva. If you liked this post, save it for later by pinning one of the images below. I can’t wait to see what you create!
