
Mastering the Art of Selling Digital Products on Squarespace: Your Ultimate Guide

Are you looking to sell digital products on Squarespace and can't seem to find the right guidance? Look no further! This guide will provide you with all the necessary steps to master the art of selling digital products on Squarespace.
I’ve used Squarespace for all of my websites and have loved how intuitive it is to set up and customize your site while also having a high-quality appearance. Now that I’ve moved into selling digital products, I’ve been using their commerce features to set up my online shop. In this guide, I’ll walk you through the process of setting up an online store on Squarespace so you can start selling your own products.
Can you sell digital products on Squarespace?
Yes, Squarespace allows you to sell digital, physical, and service or subscription products. A digital file is defined by Squarespace as, “a product that can be saved as a file and sent to a customer without personalization or modification.” This means that you can sell digital downloads, digital art or photo prints, svg files, Canva templates, and more.
Important note: Selling services or digital products (like an online course) are a bit different in terms of the plan options. To sell digital products (like a Canva template) you only need the Business plan. With this plan, you get 30 minutes of video storage, which would allow you to sell an online course that is shorter than 30 minutes. Anything longer than that would require you to upgrade to their “Digital Products” add-on, which you can read more about here.
Setting up your Squarespace store for selling digital products
If you’re already on Squarespace: skip to step 5! The only thing to note is that if you’re on the Squarespace Personal plan, you’ll need to upgrade to the Business plan to sell products on your site. See all plan details here.
You can change your Squarespace plan by going to Settings > Billing > Subscriptions if you’re already logged into Squarespace.
If you have not started a Squarespace site: start at the beginning.
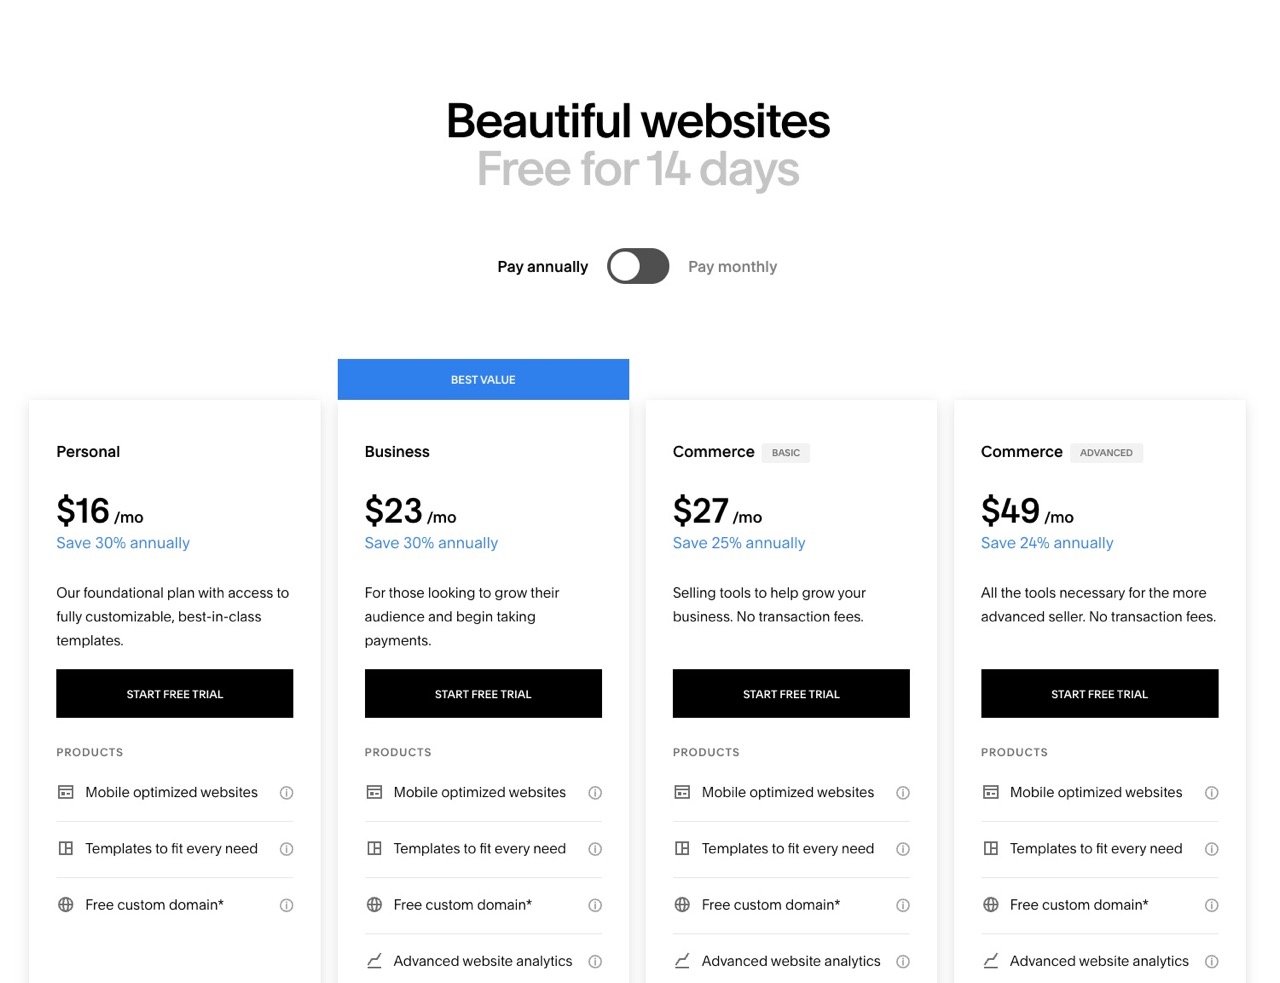
1. Choose a Squarespace plan
Select a plan that suits your needs. Squarespace offers different pricing plans, each with its own set of features and pricing options. To sell digital templates, the lowest plan you can get is the Business plan. This plan includes fully integrated ecommerce and charges a 3% transaction fee on your sales.
The Commerce plan, priced slightly higher, allows you to have a 0% transaction fee. Keep that in mind for once you start selling a higher volume of items.
2. Sign up and create your account
Visit the Squarespace website and sign up for an account. Provide the necessary details and create a unique username and password.
3. Select a template
Browse through Squarespace's collection of templates and choose one that aligns with your brand and style. Remember, you can always customize the template later to match your preferences.

4. Customize your website
Use Squarespace's intuitive editor to personalize your website. Add your logo, choose colors, and create pages that showcase your digital products.
5. Set up your online store
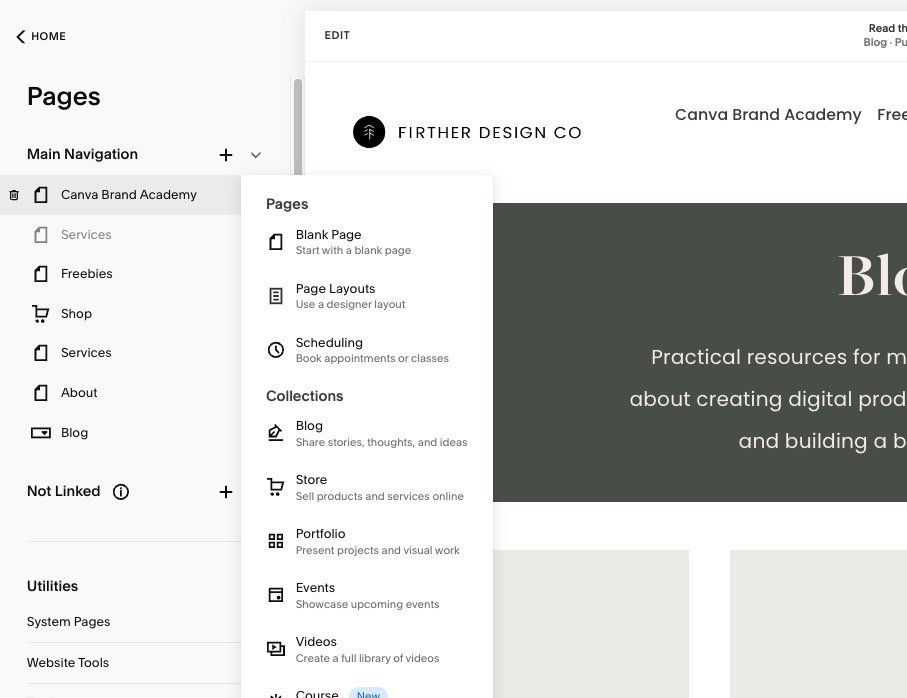
Add a store page to your site
Open your pages panel
Click the “+” icon and select “store” from the menu.
Select a layout
Style your page to fit your brand
6. Add your products
You can add your products individually or import them from an existing ecommerce provider like Etsy or Shopify. This is what I did when I opened my Squarespace store and it saved a ton of time.
To add an individual digital product listing, start by going to to the store page on your website. Click the “+” icon to add a new product and select “Digital Download.”

Next, you’ll need to add all of the information about your product, as well as the file to access your digital download. Fill out the sections for product name and description, then add your product images. If you have a lot of extra info to put on the product page, I recommend clicking the “Additional Info” section under “Details” and adding your information there. This is a good spot to put FAQs about your product, return policy, and customer service details.

Under the “Inventory” section, upload your digital product file. If you’re selling something like a Canva template where customers just need the link to the product, you’ll want to embed your digital template link into a PDF, download it, and use that as the file. After you upload your file, be sure to enter your item price.
Under “Organization” set your product visibility, categories, and add tags.
Lastly, under the “Marketing” section with the “SEO and URL” tab active, click the “Edit” link. This is where you enter the SEO title and description for your product, which is how it would show up on Google if someone searches for it.

Click save and your product will be active in your store!
Timesaving tip: You can duplicate a product listing by clicking the duplicate icon next to the save button in the top right when you’re editing a product. This is especially helpful for quickly adding product variants.
7. Create rules for shipping/taxes.
For digital products, you don’t need to worry about shipping and can just set up your tax rates.
8. Connect a payment processor.
You can view the whole list of payment processor options here. I chose to use Stripe for my payment processing (note: at the time of writing, Squarespace Payments is still rolling out and not available to me yet. When this is live, it may be a better option for you!).
When you sell an item on Squarespace, you’ll incur two fees: a transaction fee and a processing fee. The transaction fee goes to Squarespace and the processing fee goes to whoever your payment processor is. You can review all the details of transaction fees here.
To set up or modify your payment processor, go to Settings > Selling > Store Payments. Here you’ll be able to connect and modify payment processors for your store.

What are Squarespace's selling fees?
Understanding Squarespace’s selling fees is super important because it impacts how you’ll want to price your products.
Squarespace's selling fees include both transaction fees and payment processing fees. Here's a breakdown of what they are:
Transaction Fees
Transaction fees apply to all sales regardless of the billing plan.
There are separate transaction fees for Squarespace Commerce (for physical, download, service products, and donations) and Digital Products (such as courses, video pages, and member sites).
Transaction fees vary based on the billing plan and the type of product being sold.
Squarespace Payments, a native payment solution integrated into Squarespace, charges a processing fee of 2.9% + $0.30 per transaction.
Transaction fees are collected immediately after a successful transaction.
Payment Processing Fees
Payment processing fees are charged by the payment solution used, such as Squarespace Payments, Stripe, PayPal, Square, etc.
The processing fee for Squarespace Payments is 2.9% + $0.30 per transaction.
Third-party processing fees may vary by location and are not controlled by Squarespace.
Avoiding Transaction Fees
Depending on what you’re selling, you may be able to avoid some fees. Click the “Avoid transaction fees” link on this article to see if this applies to you.
Upgrading to a Commerce billing plan helps avoid Squarespace Commerce transaction fees. This plan is the next level up from the Business plan, so it costs a bit more but if you’re making a high enough volume of sales, it may pay for itself.
Upgrading to the Pro Digital Products plan helps avoid Digital Products transaction fees.
Transaction fees for orders placed under a previous plan cannot be refunded upon upgrading.
Overall, Squarespace's selling fees consist of transaction fees, which vary based on the billing plan and product type, and payment processing fees charged by the chosen payment solution. Upgrading to specific billing plans can help avoid transaction fees, but third-party processing fees remain applicable.

Conclusion and final tips for selling digital products on Squarespace
Congratulations! You've reached the end of this guide on mastering the art of selling digital products on Squarespace. Armed with the knowledge and strategies outlined in this guide, you're now equipped to create a successful online store and boost your sales on Squarespace.
Remember these final tips as you embark on your digital selling journey:
1. Continuously refine your store: Regularly evaluate and improve your store's design, product offerings, and marketing strategies to stay ahead of the competition and meet the evolving needs of your customers.
2. Stay connected with your audience: Engage with your customers through social media, email newsletters, or live chat. Build relationships, listen to feedback, and provide exceptional customer service to foster loyalty and drive repeat purchases.
3. Keep creating and innovating: Don't stop at one or two digital products. Continuously create and launch new offerings to expand your product catalog and attract a wider customer base.
4. Stay informed about Squarespace updates: Squarespace frequently releases updates and new features. Stay up to date with these changes to take advantage of any improvements that can enhance your store's performance.
Now it's time to put your newfound knowledge into action. Start selling your digital products on Squarespace and watch your business thrive in the digital marketplace. Good luck!